Friday, August 23, 2013

Cyclopes and Hairy fingers PART 2

 And to the Cyclops...     (Click on the pics for a larger view)
Last blog I showed face repaint /sculpt and hair
Tonight costuming and tats and weapons
Cyclopes were never really known for having the most shiny pristine armor or clothing.I wanted to go with a home-made looking armor 
For her costuming I struggled with the colors for this because I loved her hair color so much I didn't want to take away from that.So I went with a Sky blue and cream theme.
I started by making the armor out of polymer. I keep an extra body around..( oh that was funny to type)
to size clothes and bake the armor on.
With that tiny torso and wide hips ,Monster Highs are a little tricky to clothe.
I wrapped white polymer around ( not all the way) and cut tiny pieces of tan polymer to create stitching.
To seal on the stitching I used Liquid Sculpty .. and bake.I do a few bakes at a lower temp to not lose the original color..Sculpty will darken if baked too long or hot.. Hate THAT!
Skirt and sleeve of a linen type Sky Blue material
One day I'll actually write down the pattern for some of the clothes I make ,I either eyeball it or wrap fabric around the doll to size
costume almost finished with a tiny hole in the naval for her belly button ring.
I thought about being a Cyclopes and thought 'If I came from a tribe or race of being with only one eye, They would be Obsessed with eyes!... Kinda how I obsess about cheesecake and fitting rooms with good lighting.......meh.". for the shield I found a great medallion at the craft store,attached a handle and painted the center  stone and eye.
 Cyclopes were builders and Blacksmiths, she needed a hammer!
Box made of Popsicle sticks with bracing on the inside
Sanded down smooth with handle added 

Base painting and furry grip and elastic loop sewed on

Painted silver with tribal added on all sides
I couldn't believe how STRONG this hammer was when I was done I was tempted to run around and hit bugs with it!
Hand painted tribal all around the mohawk
and the Finish ,when I was done she had a little bit of Rock Star going on, Aww yeah!  :)


Thank you for reading this far .. and Good Night!

Wednesday, August 21, 2013

Cyclopes and Hairy fingers PART 1

Yeay New Boggy!

The Mission = Cyclops 

The briefing = A Cyclops is from greek mythology. They are a race of Giants with a single eye in the center of their forehead. Most depictions in the movies are of Cyclopes being vicious and of mal-intent  but upon further reading they were just builders.. :P.. nothing fancy,... Staten Island would Love them!
Also they created the staffs and weapons of the gods.... Poseidon's Trident and so forth. End of briefing
 Lots of other doll customizers have done Cyclopes and have done Great jobs but I'm gonna put my own spin on it....as usual
SO it was suggested to me to use the blank face from the Monster High 'create a monster lab add-on'
and it works well because there are NO eye sockets... but guess what.. THere ARE NO EYE SOCKETS!!....
Blank face, no eyes or mouth
so I'm going to have to create them...urgh!
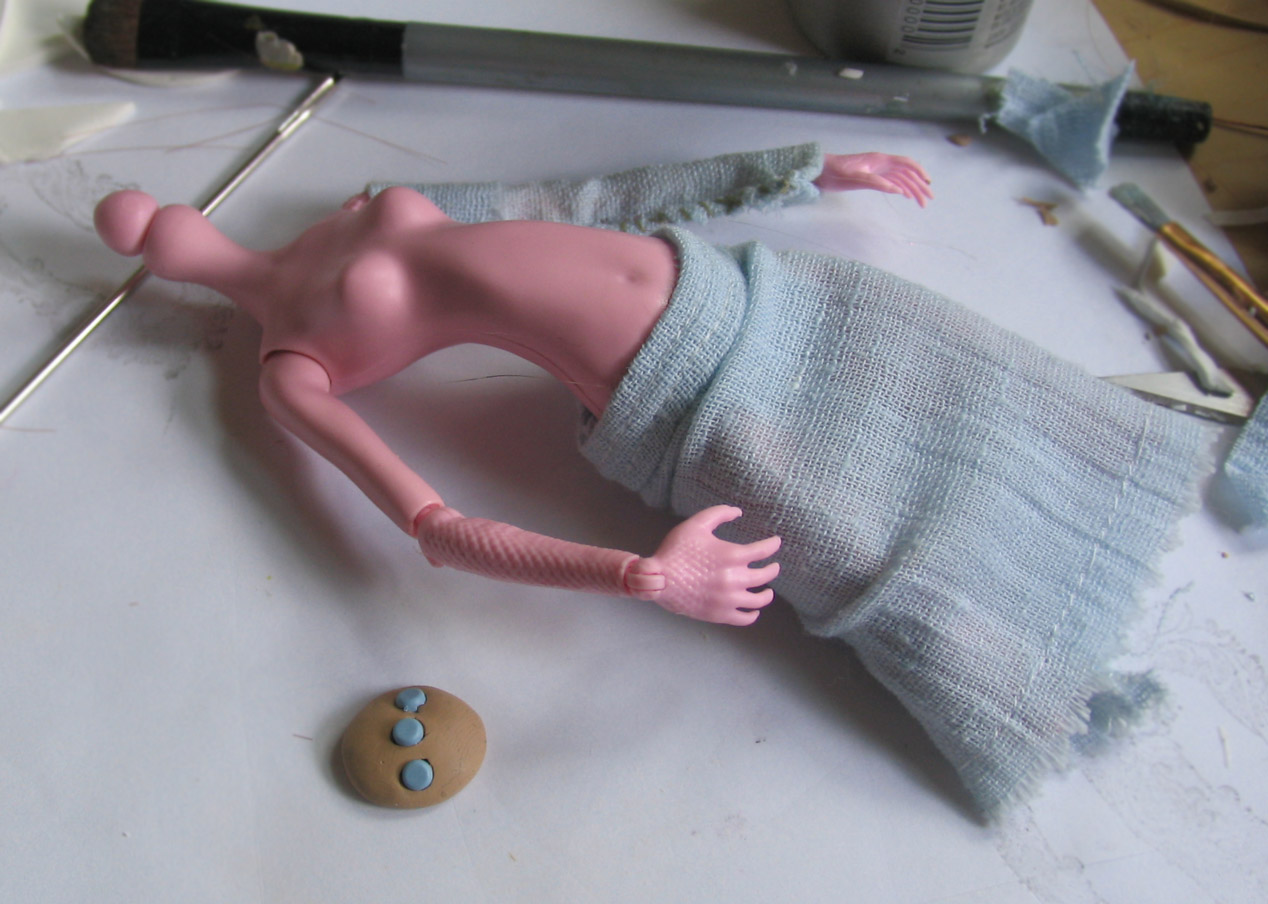
 You do what you know, so I use acrylic the kind of acrylic you use at the nail salon. it's tricky to use but dries (as some may know already) ROCK hard and sticks almost better then crazy glue to the rubber.
First and always I give her a coat of Mr. Super Clear.
THen I have to map out where all my crazy is going.
Once it's laid down I sculpted and worked with a nail filer and Dremel ( electric rotary file)
 The paint and the shading are going to take it from there.
beginnings of the eye
I also thought I really have to make this a good eye, poor thing only has one.
Before glazing and faux eyelashes
THe hair!! if you've worked with these Cam pack heads you know part of the head is hard plastic,but the rest can be rooted. I really wanted a Mohawk to center everything.
I used Tacky Glue for the center and applied it in a circle pattern and rooted the long pieces.
If my fingers weren't hairy yet they were about to be!
normally I embedded the eyelashes ...couldn't really do that this time because like I said the acrylic dries, rock hard. I applied the faux lashes ( some individually) I'm pretty sure I went to the store that day with some hair glued to my fingers...nobody said anything, I was o.k.
Gettin her hair did!
Hair finish
Next blog I will get into the tribals /costuming/armor/weapons and the finished Doll!
Thank you SO much for reading this far .. and as always ,Have a Good Night ! <3


Tuesday, August 6, 2013

Pixies,ghosts and Shoes

OK. so back to this...
IN my last blog I wrote about how I'm working on a Will-o-wisp....here's my take on it again
IN the last blog I showed how I did the hair and now we're onto the face.
Using dark and light turquoise I contoured the face.
what I wanted to do was and ornate feathery almost headband at the hair line which would allow me to use some glow-in-the-dark paint and have it cascade up into the hair.. so I started with this
the G-I-T-D paint I was using was textured as to why it's lumpy
ANd all I kept thinking was 'THis Looks Kyptonian'.. I HATED it,grabbed some acetone and with much effort cleaned off her whole forehead and started again.
I'll come back to her face in a minute.
Lets talk about doll feet!!
MOst doll feet are in a high heel shape and what I was going for was a ballerina foot... something graceful....so I had to do the unthinkable...I Cut off her toes!!
Cut off toes with several layers of glue on top
I found this great Glow-in-the-dark polymer and sculpted right over the glue.
Sculpted ballet shoe from polymer
I also noticed if you rub glitter on the polymer the glitter lays flat and creates a sparkly sheen!
I then coiled ribbons of the polymer to create an abstract lacing and adhered that to the leg with liquid sculpty... NOW heres' the trick.. HOw am I going to BAKE that ? You're wondering right now..
Well you don't... BIG SECRET RIGHT HERE-----> you prop up a blow dryer on high and aim it on the direction of what you want to get heated.. Yep,I'm dead serious.......you have to check it often,make sure everything is safe and not obstructing the blow dryer.. after about 10 mins turn off the blow dryer and let cool down and then do it again .. do this at least 3 times
The dress...
I took pieces of tule and air brushed a gradient blue 
I sewed the top on first and then added all the bottom strips separately
I sewed iridescent beads and made some Glow-in-the-dark beads too....I wanted the glowy orbs to surround her
 Super easy,roll little balls make holes and bake

... OH yeah that face again
I did an extreme smokey eye. The eye itself I painted a normal eye very lightly and then did washes of white and Glow-in-the-dark paint over to give a ghostly effect... not really creepy...for me a Will-o-wisp is both paranormal and fairy like so I wanted the face to be a mesh of both.
I added the tiniest rhinestones 
I made her orb out of the same Glow in the Dark clay for her to hold...between all the Glow-in-the-dark  stuff and the glitter my studio looked like Chuck Norris put a Whoopin on some fairies!
But in the end I think I can pretty close to the drawing.....yep the one on the top of this page
THis glows really bright in person


I'm still in the process of taking pics. Amazing and serendipitous. I had her finished the exact day of the person who it's for Birthday and I didn't even know!
Thank you for reading,Have a Glowy evening :)